Monday, February 11, 2013

Garden Stats

About a year ago I made a rather abrupt transition, in terms of employment and identity, from Nanny-Educator-Flower-Child to Computer-Geek.  It was a bumpy ride, but here I am, facing the 2013 growing season with a new skill set and identity.

OOOKKK it's not ALL new.  I am kind of a Computer-Geek-Flower-Child.

So I am building an App to track my gardening activities this year.  It is under construction, but I plan to be able to track all kind of things relating to crop types, varieties I am planting, harvest details, and perhaps location and weather data.

For now, here is a chart of some crops and varieties that I grow, grouped by genus.
(Not all my varieties have been entered; this is just a sample)


If you were going to track and chart your garden, what would you include?

Sunday, November 4, 2012

Caulifroccoli

One of my "new" plants this year was purple cauliflower.  I haven't grown cauliflower before, but not only is purple cauliflower a trendy (and spendy) veggie these days, I also read that it is supposedly easier to grow than white cauliflower.  It likes cold weather and early planting, so they were started very early indoors and planted out in April.

My purple cauliflower was not difficult to....grow.  Per se.  It was not afflicted by bugs and it was not troubled by inattentiveness.  In fact it flourished, producing bundles of tropically-proportioned leaves, which I felt were very beautiful and provided a horizon of lovely texture in the garden.

The only thing was there was very little cauliflower to be found.

Actually the really weird thing was that the plant seemed to grow in three different ways.

This is a lush and leafy plant with no evidence of cauliflower at all.  About half of the 8 plants were like this, and never developed any vegetal vestiges.

This plant has some little bits that might be purple cauliflower, but it's hard to tell, even in real life.

This is my favorite, despite it's inedibleness. It consists of huge stalks of purple cauliFLOWERS, almost six feet tall.  This is not a matter of 'it used to be cauliflower and I let it bolt.'  There never was any cauliflower.  Just this ambitious lovely spray of green and purple.  I begrudge it nothing.  And although it was anything but a head of dense nutritious purple cauliflower, these flower stalks, lightly steamed, made a frankly lovely and nearly edible garnish.
I let these plants just follow their joy all summer, occasionally checking for developing vegetables.  Really they just looked like the above for a really long time.  After a few hard frosts, I started pulling out the frost-wilted tomatoes and peppers and basil, hauling them all to the compost.  The cauliflowers were untroubled by frost, so I let them be.

And then by George.  They started making cauliflower.  

As I alluded in my blog title, this vegetable was really kind of halfway between a cauli and a broccoli.  
The lovely late-October harvest was diminutive compared to the immense leafy plants they came from, but I will be growing cauliflower again.  I thought they were lovely and exciting plants all season, and the eventual harvest is unrivaled in taste and beauty.

If you have a favorite variety of cauliflower, or any tips or stories about growing it, please let me know!

Sunday, October 7, 2012

Pirates Invade Tiny Happy Farm


After the looting and pillaging subsided, the pirates settled down and created a small avalanche of art submissions for the Museum of Chickens, Cows, and Americana.  

Stay tuned for updates as the museums collection grows.  
Meanwhile, submit your art by following the link below.  
Any art/ all artists are welcome to join this public art project!  


Tuesday, September 25, 2012

Unintentional hybrids Part 2: Seed Saving gone WILD


Last year I wrote about what happened when I tried to save the seeds of my favorite pumpkins.  Basically, having exercised no control over who pollinated the punks, the following year's offspring were inedible gourd mutts.  Like mutts often are, they were wildly successful, but even though I had about 50 of the unsightly things in my yard, I never took a picture of them.  I was very disgusted about it.

This year, I ordered my seeds from a catalog.  Winter Luxury Pie Pumpkin and Jaune Gros de Paris.  I planted two of each, and they produced a sea of lily pad pumpkin leaves, which by August was studded with jewel-like orbs of Vitamin A.

In the photo at left, they are the lovely orange globes and pink blobs.  It's hard to tell the scale, but the big pink ones are almost too big to lift.

By now you have noticed that there are more than two kinds of squash in that photo.  I did not plant any of them.  They are the results of benign neglect and a streak of mad scientist in their attending gardener.  These gourds grew in the compost, in the garden, under the pine tree, in the orchard, around the chicken coop, and incognito in the pumpkin patch.  I let them grow where they sprouted because I was curious.  Although some of them were so far undercover that I did not even know about them until this week!

They are the wild offspring of all the cucurbits I have ever grown, in some combination.


It makes me feel like my yard is a place where exciting things happen!

Fermented Pickles


This pumpkin grew near the end of the rain barrel hose.
Nothing to complain about in a Minnesota garden this year. While much of the country struggled with drought, I never had to water my garden!  Some of this was thanks to my commitment to MULCH and my rain barrel, but all in all it was a great natural growing season, with moisture and heat in all the right places.

This year I grew cucumbers for the first time - two kinds, including a cornichon type, so I was excited for tiny pickles!  It turns out you must be a quite diligent farmer to catch them when they are little tiny babies (and they are very PRICKLY, who knew?), and cornichon type pickles do not grow out of infancy with the grace of plump picklers.  Instead they bloat out in weird ways, and they remain DANGEROUSLY PRICKLY.  The prickles rubbed off in a sink-rinse, but it is inconvenient if gloves are required protective wear for cucumber harvesting.

Can anyone offer testimony about small cucumbers that are not lethally prickly?

The other cucumber was supposed to be a standard midsized cuke, but again they were often neglected until they were overgrown, overripe, an alarming shade of raw ocher.  The problem for all the cukes was crowding.  I have been gardening for just long enough that I PREACH the gospel of plant spacing to my garden friends, but not long enough that I do not still learn the hard way every year.  The cukes were a last minute decision, crowded in with the climbing beans.
The upshot of two very productive cucumber vines was about three gallons of fermented pickles!  I feared they would taste weird, but they were  SO.  GOOD.  Craveable.  And it was a proud day when I filled my fermenting crock with cukes, garlic, dill, grape and horseradish leaves ALL from the yard.  After 5-7 days of quiet bubbling on the counter, the pickles were ready, and I transferred them to the fridge.  So easy.

Next year I will give more informed consideration to my choice of cucumber seeds (tell me your favorite!) and I will give them ROOM to stretch, grow, and be harvested with ease.

It might be too late for you to try fermented pickles this year, but it is the perfect time to grab one of these books so you can read up and be ready for next year:

Wild Fermentation is a well known resource for everything relating to fermented foods, including bread, beer, vinegar, cheese, miso, pickles...  the list goes on.  I checked it out from the library a few times before I concluded I needed to just own it.

Nourishing Traditions is a book that changed my life, really.  I won't get into it here, but if you want to read some radically different ideas (so old they are new!) about food, this book is awesome.  It also includes lots of info about fermentation and is just different enough from Wild Fermentation that they really complement each other.

While you are here, please visit this page and submit an artwork to my project!   ALL art is welcomed Adwords for Artworks

Friday, September 21, 2012

Chicken Divan: First National Chicken and Cow Museum

Mischief is afoot here at Tiny Happy Farm.

 A nebulous challenge, a mysterious stranger, and the First National Chicken and Cow Museum.

 Please come back soon for updates.

Tuesday, December 13, 2011

Unintentional Hybrids and other adventures in seed-saving

The GARDENING shelf at the library has a lot of books.  And plenty of them with local/organic/sustainable/21st-century-hippie themes, as gardening lends itself to these interests.  I am steadily chugging my way through all of these books, and inevitably trying a lot of the things I read about.  That is pretty much how I ended up with chickens.
Just think of them as big delicious seeds...
In addition to chickens, another theme that FREQUENTLY surfaces in these books is seed-saving.  I have read descriptions of how to collect and preserve the seeds of various plants, how to create my own breed of fantastic tomato, and generally how awesome, advisable, and easy it is to save your own seeds.  

So last year I decided save a couple of easy seeds, just to try it.  The first seed I collected was from my nasturtium plant.  (nasturtiums are a lovely, peppery edible flower that I highly recommend.  They are beautiful in pots as they will spill over the side and bloom profusely all summer long.) The plant itself actually suggested the idea when it turned up with loads of big green and tan seeds all over the place.  Of course many seeds are so small that seed-saving would be a detail oriented activity, but nasturtium seeds are bigger than peas and hard to miss.  I was not sure how to save them, or which to save (green or tan?), so I just put them all on a cookie sheet and let them air dry for a month.  

The other seed I saved was from one of my Winter Luxury Pie Pumpkins.  It was my first year growing this particular pie pumpkin, but it was easy to decide that this was my new favorite pumpkin.  From just two plants I harvested more than 20 nice-sized pumpkins.  The flesh was sweet and delicious AND the rind was soft enough to easily peel the pumpkins for one of my favorite recipes.  Also, pumpkin seeds are another type of seed that is easy to locate, identify, and handle!


**this recipe looks and perhaps sounds a little unusual, but my friends, just try it.**


I rinsed the seeds out of the pulp, and again, just spread them out to dry for a month.  After that, I stored both types of seeds in paper envelopes (not plastic bags, as I wanted any remaining moisture to be able to easily escape, and not cause mold or rot). 

Truly, I expected this experiment to be straightforward, easy, and successful.  Instead, the results were surprising and funny.

NASTURTIUMS
The seeds were in a variety of states when I collected them, from juicy spring green, to attractive dry tan, to desiccated dark brown.  I didn't know what they were supposed to look like, so I planted some of each in my sprouting pots, as as far as I could tell they ALL sprouted.  So far so good!  I had lots of extra seedlings, which went to the gardens of my friends.  Three plants made it into my garden; they grew at a healthy rate and then bloomed.  And this is what happened:
They grew in three different colors!  The mother had only orange flowers, but here you see the technicolor evidence of the genetic forbears of my original plant.  Fun!  All the flowers were perfectly tasty, so this experiment in seed saving was perhaps even MORE successful than I hoped, as it came with a delightful color twist.
Feathery marauders interrupting the floral photo-shoot.  Nomnomnom

PUMPKINS
Woe.  Woooeeee is meee.  WOOOOE!!  

Oh, I get emotional when I think about my poor pumpkins.

The seeds I saved were from one of these pumpkins:
Winter Luxury: beautiful tender orbs of golden sweet flesh.
 When last year's batch of Winter Luxuries was growing, they started as deep green tennis balls with yellow webbing, and grew into dark green basketballs, not turning orange until very late in the game.

When the seeds I had saved sprouted and grew, I thought things were going great.  But as soon as the first fruits started to grow as odd yellow things, I knew something was amiss.  When I realized what had happened, I was floored.  My old nemesis, scallop squash, had one final trick up its sleeve.  This squash was almost the end of me last year:
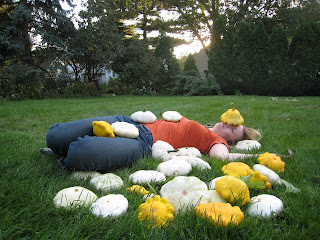
If the seed catalog says a plant is "prolific,"  it might be a warning, not a promise.
My beautiful pumpkins were pollinated by SCALLOP SQUASH!!!  And the alien yellow blobs laying all over the grass were their unholy offspring.  They were just as prolific as BOTH of their parents, and truly, if they had turned out to be edible, all would have been forgiven.  I waited optimistically until fall to bake one up.  It was disgusting.  Inedible.  
This squirrel disagrees.  Bon appetit, squirrel.
And yes, my squirrels are black.

So here are my conclusions on seed-saving:

1-I think very few of the people writing these crunchy granola homesteading books have actually TRIED seed-saving.  I think they are reading each other's books, and thinking "AH, what a lovely crunchy granola idea!  I would be remiss if I did not mention it in my book as well!" without ever bothering to try it.  I think in fact they order their seeds from rareseeds.com like every other crunchy granola homesteader.  

2-The reason for this is that in a home garden, even a big one, there is no conceivable way to control who pollinates who.  I had heard stories of zucchinikins and pumpkinicumbers, but like a trusting parent, I thought it would never happen in my yard.  Don't be blind, gardeners, those frisky plants are all over each other.

3-I still think saving flower seeds is a nice idea, because much less can go wrong.  If you take my advice and somehow end up with a flower that is ugly and smells bad, please let me know so that I may amend my position.

If you have a seed-saving experience to share, please leave me a comment!

Wednesday, September 28, 2011

Squash Blossom Season!


I have been wanting to cook with squash blossoms for a while now, but in previous years, the opportunity has slipped past while I wondered how to cook them.

he loves me not...he loves me!
This year I had the perfect inspiration from my friend Katie, whose husband is from Mexico, when she told me he has been hankering for squash blossom quesadillas for years.

Step 1: pick some squash blossoms!  Or zucchini blossoms, or pumpkin blossoms....  If you get to them before about 11am, they might be lovely and open like the picture to the left.  After noon, they close up shop for the day, but they are still good to eat.  (I had a mix of open and closed.  Several of the closed ones had bees trapped inside, and I watched in amazement as one trapped bee repeatedly poked his stinger through the petals!  I guess I'd be mad too if someone woke me up when I was sleeping in a flower...)

I sauteed onion, garlic, and mushrooms, and then added a pile of shredded flowers and a handful of chopped fresh Epazote.  (This was the first time I have cooked with epazote, having seen the word in print and wondered about it many times...  it was at my nearby Latino market near the cilantro.  It's a very different flavor and REALLY GOOD in quesadilla filling!)  This picture was taken soon after adding the flowers; when they are done in a couple minutes they look much less like flowers.
 CHECK. IT. OUT.

BLUE TORTILLAS!

Ok, really they are kind of grey, I know.

But I was excited.

Queso de Oazaca, a nice melty mexican cheese.
Start with one tortilla in the hot pan for 30 seconds or so, then flip it over.  Add a handful of blossom filling and a handful of cheese, then cover it up with another tortilla.  Flip it when it's melty enough to hold together and grill the other side a little.
While the quesadillas are cooking, enjoy a bottle of my favorite Puerto Rican pop, Malta India!  I am not much of a pop drinker, but I love Malta India, and always buy it when I visit a market that carries it!  The flavor is different, but it grows on you.
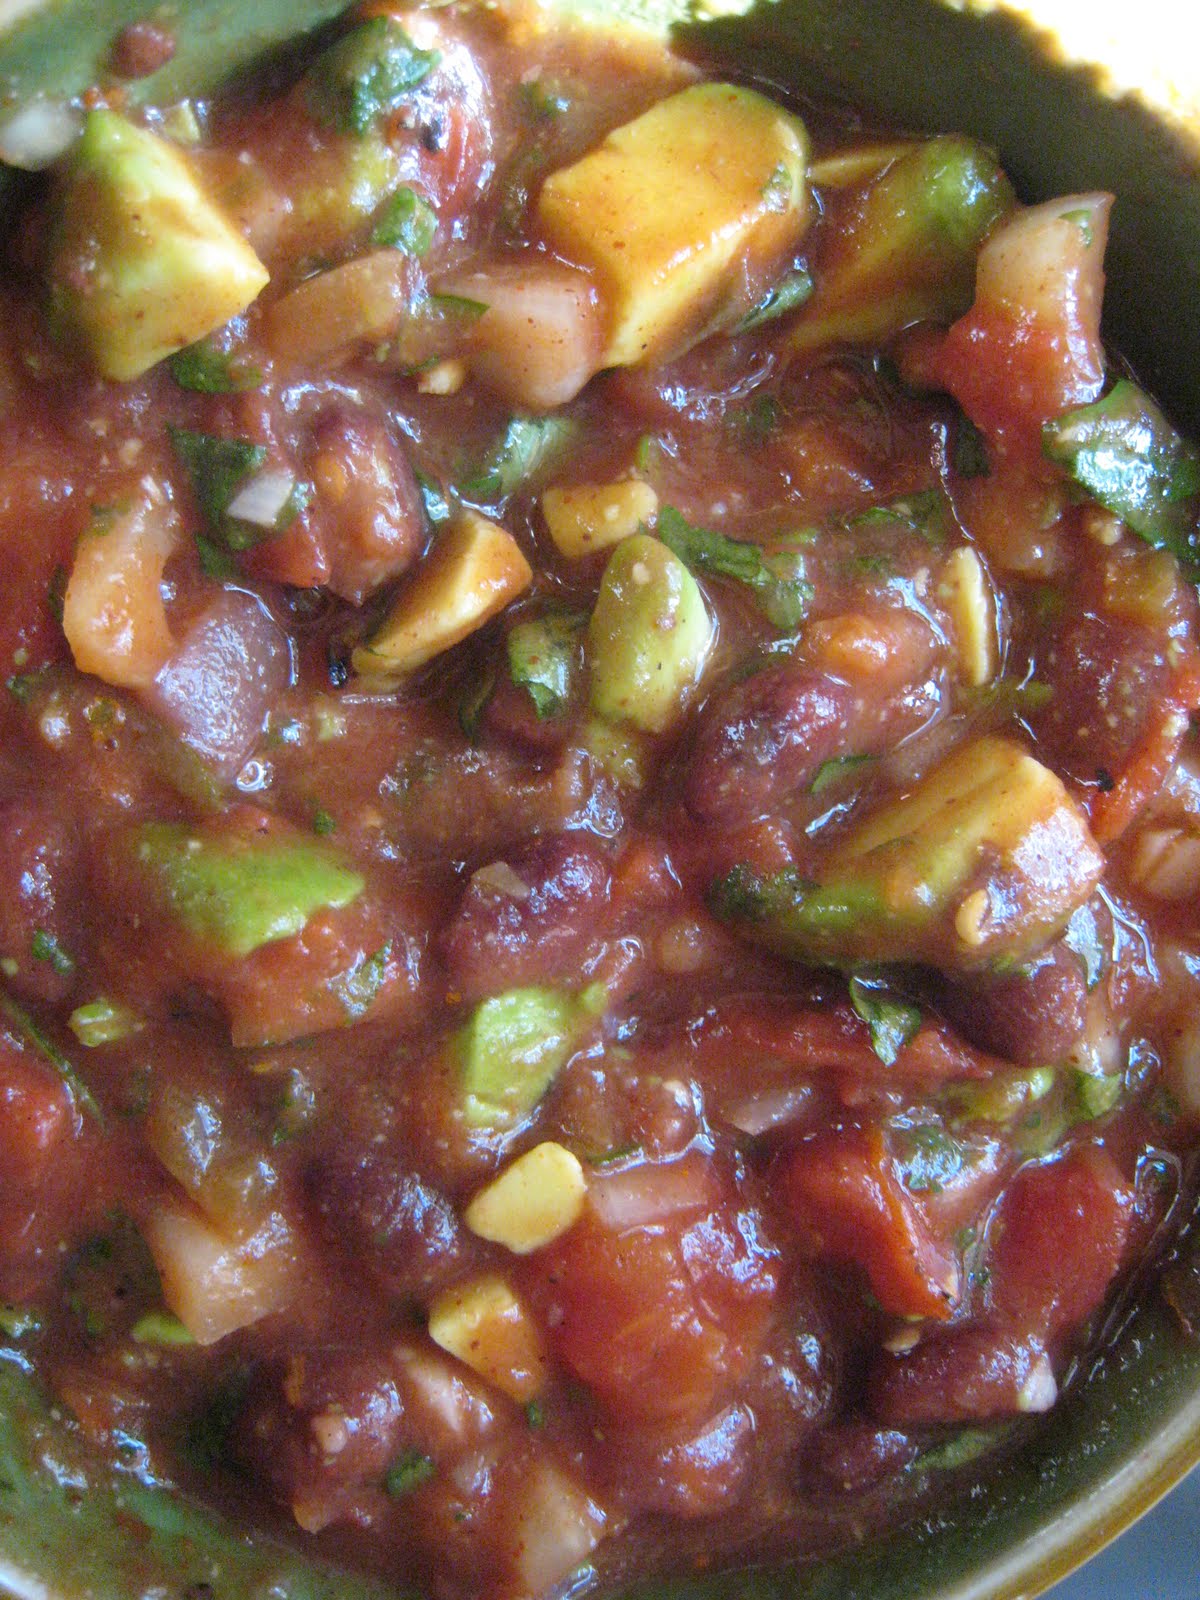
I make gallons of fresh garden salsa, ferment it slightly (a la Traditional Foods, Nourishing Traditions, etc, if you are into that) and then we eat it like it's going out of style for a couple months.  This batch appears to have some avocado bits in it - heaven!  (I add the avocado right before serving)
Now I know- heaven is watching the chickens over a dinner of squash blossom quesadillas and Malta India.

Hell is when the chickens start jumping into your lap and stealing your food.

!Buen Provecho!

Thursday, July 21, 2011

Mid Summer Report

Midsummer roundup at Tiny Happy Farm:
I saved seeds from the nasturtium I had last year and started them in seed trays this spring.  The seedlings that I planted in a big pot all died during some storm or something early in the summer, and I was sad.  THEN three nasturtium plants sprung up in the garden, weed-style, right where the old one had dropped its seeds.  I let them be, and they recently started flowering - in three different colors!  The one I had last year was bright orange, but its babies are every shade between yellow and red.  Yay nature!
My watermelon plants have been the slowest growing things on the planet.  This one has been the smallest, and that vine off to the right represents a recent huge effort on its part.  Until recently it has been about the size of a dandelion, appearing healthy but unmotivated.  Two other watermelon plants are finally growing, but they seem to have no idea there is a deadline here.
The chickens get fluffier and fluffier :-)  No eggs yet.
The peppers are setting fruit in abundance, which is encouraging, as my peppers were mostly a flop last year.
CAN YOU SEE all those tomato flowers???  I don't thing this is even a cherry tomato plant!  I'm scared!
Now a midseason review of the Three Sisters Garden.  If you have been playing along you know that this is a Native American way of planting Corn, Beans and Squash in the same area.  The Beans climb the Corn and fix nitrogen in the soil.  Nitrogen-loving Corn is braced up and protected from corn-eaters by the climbing Beans.  Squash covers the soil with vines, which act as a living mulch to conserve moisture and shade out weeds.  That is the theory anyway.

I'm not sure if you can see it well here, but the beans are indeed vining right up the corn.  In some cases the beans are WINNING and taking the corn DOWN, but mostly this symbiotic relationship seems to be panning out.
One stalk of corn is about 10 feet tall.  I'll have to take another picture with me standing next to it or something.   Maybe it's just trying to outrun the beans...
Overall the whole thing is really pretty.  You can see the short spiky popcorn stalks in the front, and the taller indian corn is in the back.  At the beginning of the season this patch was REALLY REALLY weedy, as this is the first year that I have planted it, and I didn't do a very thorough job of preparing it.  And I have to say the living mulch thing is working well.  There are still weeds, but for sure they are having trouble finding anywhere to grow at this point!
 So mostly positive reviews from me.  One mistake I did make was planting Zucchini and other summer squashes in this patch, along with pumpkin and watermelon.  LOOK at this patch.  HOW IN THE WORLD am I supposed to find a Zucchini in there???  It will have to be the size of a volkswagon before I could possibly notice it.  Beyond that, the beans have yet to fruit, the corn is just tasseling, and the pumpkins have not set, so the final review is yet to come.

#*&^@#$*&@#$^@(#*$^#(@*&$

The chickens are enjoying their attached run.  I took this picture right at dusk; I looked out my kitchen window and they were just climbing their ramp.  By the time I got out there with the camera, they were all lined up on their perch.  At that point there is always a little commotion as they try to get underneath each other to sleep.  Then they remember that they are grown ups and they settle down for a nice night's perch.
The radishes really "took".
-The peas have come and gone with a great harvest, and now I'm thinking about a fall planting, which I have never done...

-Beets are just starting to plump up; I ate my first bunch this week, all at once, with predictably amusing results in terms of... output.  I also LOVE to cook beet greens.  I have never grown kale or chard, but I don't really need to because I have BUSHELS of beet greens.  With their beautiful red stems and veins they even look like rainbow chard.  If you are new to cooking greens, try sizzling up some chopped bacon with garlic, add a HUGE pile of greens and some white wine or stock, cover and cook for 8-15 minutes, uncover and let the excess liquid reduce.  It's like green candy.

Tuesday, June 28, 2011

Mmmmm, Sandwich Mulch....

Maybe they still make this stuff; I have never looked.  When I was little, my mom bought grocery-deli containers of something we just called Sandwich Mulch.  Thus, I am not sure what it really was, but if I had to guess I'd say maybe ham salad?  We viewed it as a special-occasion food, as I recall, although the special occasion was pretty much... lunch.  

This blog is not about that.

This blog is about my neighbor's garden.  Here, I took a picture:
Yes, I took a picture of my neighbor's garden.  And put it on my blog.  
 Q: Why is my neighbor's garden a desiccated wasteland of spindly peppers, blighted tomatoes, and crabgrass?

A: No Mulch.  (Ham Salad or otherwise)

Garden mulch is basically ANYTHING you put down over the bare dirt in your garden.  There are different advantages to different materials, but they ALL have advantages over bare-dirt gardening.

Benefits of Mulch
-MUCH less watering
-MUCH less weeding
-Usually looks nicer
-Adds nutrients back to the soil (if mulching with organic matter)
-Regulates soil temperature
-Prevents some plant diseases (which can result when bare dirt splashes onto plants in the rain.  Yes, this is a thing.)
-Better root systems

There are also many many kinds of mulch, in three categories:
1-Organic Matter: Straw, leaves, newspaper, wood chips, compost...
2-Non-Organic Matter: Landscaping fabric or plastic
3-Living Mulch: more about this below

Organic Matter Mulch:
So here is the herbs area of my garden.  This is my second year mulching with straw, and I like it a lot.  And actually newspaper was originally part of this concept too.  Here was my plan:  Last year before planting, I covered the garden areas in a thick (6+ sheets thick) layer of newspaper.  I wetted it down so it wouldn't blow away immediately.  Then I covered it all in a THICK layer of fresh straw.  (NOT hay.  Hay has hayseeds in it, which is bad, unless you want to grow hay.)  When it was time to transplant seedlings, I pushed aside some straw and tore a hole in the mushy newspaper and planted.  It was DREAMY.  Virtually weed-free, no-watering gardening.  By this year the newspaper had vanished; there is no evidence of it.  But the straw is still there, I just reused it.  And the weeds I think were so discouraged last year that they have not tried again.


Non-Organic Mulch:
You are not going to believe this.  This is my other neighbor's garden:

I am not a judgmental garden snob and neighborhood snoop, I just play one on my blog.  :-S


This approach has it all over the bare-dirt plan, but there are some drawbacks.  I actually used landscaping fabric to mulch my garden two summers ago, which was my first garden.  If you are going to do this you must use the water-permeable kind, obviously, as opposed to the black plastic liner they use for landscaping where nothing is intended to grow (like if it's going to be covered with rocks or something.).  

One advantage of the fabric is it will heat up your soil in early spring, and your tomatoes and peppers will grow like crazy right away! 
One drawback is that it is, conservatively speaking, very ugly.  

When I used it I covered it with wood chips.  So it looked nice, but at the end of the season I had two problems: acres of landscaping fabric and wood chips.  On the plus side, I never had to water that garden, not even a single time.  Not really weed it either.  

Living Mulch:
This is a new idea for me, which I am trying for the first time in the form of a Three Sisters garden.  If you like your gardens trendy, then this is a sweet example of PERMACULTURE design.  If you like 'em traditional, then this is an ancient NATIVE AMERICAN concept.  Simply, it is an interplanting of corn, beans and squash.  The corn provides a natural pole for the beans to climb.  The beans fix nitrogen in the soil.  And the sprawling, big-leafed squash vines provide a LIVING MULCH, shading out weeds, conserving moisture, and all the rest.
The three sisters are adorable and toddler-sized for now....
 Since this is my first year with living mulch, and I'm still working it out, I reserve judgement for now.   Stay tuned.

A mulchy garden is a happy garden.  This one is actually my garden.

Tuesday, April 26, 2011

Vermicomposting

You know how every once in a while you will find yourself with an empty can or bottle in your hand, and NO appropriate place to put it?  It is increasingly rare, but of course there are still buildings, events, and places in the world without recycling bins.

When this happens to me I feel bewildered.  If the only place to put my empty bottle is a general garbage can, that option makes about as much sense to me as carefully sticking my spent gum to the wall, or pooping under my desk.  Happy little member of society that I am, I have dutifully assimilated the prevailing norms that govern cans and bottles: recyclables go in the recycling.  Not in the lake, not in the toilet, not in the garbage.  Duhhhhhhh.

Lately I've realized I now feel the same way about banana peels, carrot tops, and apple cores.

About 2 years ago I saw something new at the nature center: a worm composting bin.  It was a cold winter day, but the bin smelled like a forest after the rain.  In a fluffy bedding of shredded newspaper, small red worms were breaking down vegetable peels and broccoli bits, and according to the informative sign nearby, they were producing high quality fertilizer as a byproduct.

Shortly thereafter I was drilling air holes in the top of a Rubbermaid tub.
This is not me, but since vermicomposting is so exciting I was soon helping my friends set up their own bins.
Vermicomposting is great for a few reason:

1-The name is very funny, and in fact reminds me of an Ole and Lena joke.  I won't repeat the whole thing here, but the punchline is "You have to keep the verms varm!"  Haha!  ha.

2- Your kitchen garbage will fill up much more slowly, and be much less stinky as you will almost never put food in it.

3- You will feel all puffed up and proud of your shrinking carbon footprint.

4-  In the bleak cold days of January, you can crack open your bin and catch a whiff of fresh spring dirt.

5- You will in fact get high quality fertilizer as a byproduct; if you just have a couple houseplants, you will make them very happy.  If you have a yard or garden, all the better!  I read somewhere that vermifertilized plants grew 187%  bigger than non vermifertilized counterparts.  (Please note: Vermifertilized is not a real word, I just made it up.  Vermicomposting is real though.)
If this picture doesn't convince you to try it then I don't know what else I can say...
Here are some things I find particularly interesting about vermicomposting:

-the reason the bin does not smell bad is that the worms actually DON'T feed on the food scraps you put in.  They eat the bacteria that break down the food, and small bits of the bacteria-rotted food.  Ordinarily bacteria would break down the food and cause a smelly rotten mess.  The worms are all over this situation like ...worms on rotten stuff.  After a therapeutic trip through a worm's belly, it now smells like good clean mud.

-The "compost" that you get from a worm bin is very different than the compost you get from a back yard compost pile.   "Regular" compost is just broken down plant matter, and of course it is great stuff.  But worm compost is really straight up manure.  Like cow manure and other strong fertilizers it could actually "burn" your plants if you apply too much all at once.  (I have not experienced any problems, just don't mistake the rich black "compost" for potting soil!) 

-Worms just looove avocado shells and seeds.  Isn't that interesting?  The clump of worms pictured above was probably just plucked out of an avocado shell, where they can usually be found in an ecstatic worm cuddle pile.

-Vermicomposting is so low maintenance, I sometimes go several weeks without opening the bin.  I just keep a crock on my counter where I put veggie scraps, and just dump it in when it's full!  The worms are fine.
This is a worm egg!  It's just a little bigger than a mustard seed, and in three weeks 5+ baby worms will emerge.
When you decide to set up a worm bin, you can easily find internet resources with detailed instructions and FAQs, so I won't repeat it all here.  I'll just show you my incredibly easy setup:

You will be tempted to buy a fancy scientific worm composting habitat for $100.  If you are rich, then I say go for it.  Otherwise, get 2 nesting rubber tubs.  That way you can drill a couple drainage holes in the inner tub, and excess liquid will drain into the outer tub.  Drill lots of air holes in the lid. 

The worms need some kind of bedding.  Damp newspaper will do the trick.
The VERY FIRST DAY you set up the bin, put it on a hard floor or on newspaper or something.  When you first add the worms they might try to escape!  When I set up my bin and left it near the top of my stairs, I came home to find a parade of panicked worms marching downstairs.  I don't know why, but I have read that this is actually quite common in the first day before the worms settle in!  The good news is, after the first day or two you will truly never have to worry about this again.  The worms will have no inclination to leave and will stay happily down in their garbage, even if you leave the lid off.

Here is a batch of worms dumped into a new bin....  you can see how they are a little ill at ease right now.
Add a handful of dirt; worms need grit for their gizzards!
Worms are wonderful pets.
One of the first times I looked through my compost; you can see a few worms here and TONS of eggs!

There is more to know about it, but the main thing I wanted to show you is that vermicomposting is really easy!  And it is like having a recycling center in your house, where you get to witness how the easy step of of putting some waste in a different bin easily transforms it into a new useful product.  The only downside might be the new uneasiness you will feel when you eat an apple out in public and find there is no neatly labeled bin for worm food!
how awesome would it be if you saw this little guy on bin in the lineup of waste receptacles!  :-D